It’s finally time! The reveal for the very first annual Bead Peeps Swap ‘N Hop! I was lucky enough to have 2 partners so this will be a VERY long post but it will have lots and lots of sparkle and pretties!
The Bead Peeps Swap ‘n Hop is a fun event where you get a partner (or in my case 2), swap some beads, and make some awesome jewelry. The one “requirement” for the hop was including an artisan made component, which you could make yourself or purchase if, like me, you’re just not that talented.
First off a big shout out to our host Linda Anderson of CherryOnTopDesign! She put a crap ton of work into matching partners and trying to give everyone a great time! Make sure to head over to her blog and she what she created!
So as revealed in earlier posts my partners are Stephanie Haussler of Pixybug Designs and Kelly Hosford Patterson of Pyxeestyx – Traveling Sideshow. You can read about Stephanie here and Kelly here. I really got lucky because each partner had their own distinct style. Stephanie works with seed beads while Kelly is a textile artist.
Here is what I sent to my partners:

Sent to Kelly Hosford Patterson.
Artisan Component: Clay toggle, don’t recall artist

Sent to Stephanie Haussler.
Artisan components: Cab by Kinga Nichols, Shirbori ribbon by Deborah Weaver
What I received from my partners:
Stephanie sent me and awesome collection of seed beads!
- 4 mm firepolish
- 2 type of czechmate 2 hole tiles (purple and peacock)
- pearl druks
- lemon lentils
- quartz saucer beads
- white halo pinch beads
- czechmate bricks
- rose halo melon beads
- swarovski crystalette buttons
- white 15/0
- light green 11/0
- purple seed bead mix
- green superduo
- lampwork cab by Chris Haussler (her husband)

Received from Stephanie Haussler
Artisan components:
Lampwork cab by Chris Haussler

Close up of artisan component
Kelly send an awesome arrangement:
1. Sari silk
2. Periwinkle eyelash yarn
3. Metallic purple Quartz crystal points
4. Heliotrope Quartz crystal points
5. Color shift lampwork glass rectangles with murrini (artist unknown)
6. Purple Zebra Jasper rondelles
7. Pink/purple/peach Agate coins
8. Opaque purple cultured sea glass barrel beads
9. Charcoal gray fresh water pearls with peacock luster
10. Light Sapphire cultured sea glass square spacers
11. Opaque sky blue Tiara glass crystal rondelles
12. Opaque periwinkle color shift Tiara glass crystal rondelles
13. Transparent periwinkle color shift Tiara glass crystal rondelles
14. Transparent lemon yellow Tiara glass crystal rondelles
15. texture copper rectangle beads
16. Hammered copper washers
17. lampwork glass satellites (artist unknown)
18. Upcycled tin Iris petals
19. Handmade copper hook closures
20. “Raven” hand stamped copper bracelet bar with Labradorite, Amethyst & copper wing dangles
21. “Ride like the wind” hand stamped etched copper motorcycle focal

Recieved from Kelly Hosford Pattern Artisan components: “raven” stamped copper bracelet bar with amethyst & labordorite, etched and stamped motorcycle copper square, hammered copper rings, hammered copper clasps (one with lampwork accent)

Close up of artisan components
I was able to make TONS of goodies from each, and some pieces had components from both partners. I noticed that a lot of my pieces were either influenced by other artists or I used a pattern (which is not my norm, I’m not a big pattern person). And I still have lots and lots of stuff I’ll be adding to my stash (hehe).
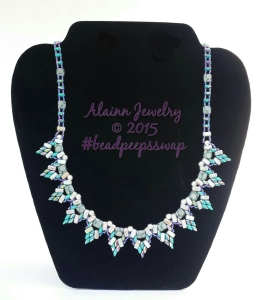
This piece I had a lot of fun with. I was inspired by Beadist Artist from facebook. She always does these wonderfully asymmetrical bead embroidery pieces with awesome fringe. I used the lampwork cab made by Stephanie’s husband, pinch beads, peacock czechmate tiles, swarovski crystalette buttons, melon beads, firepolish, 11/0 and 15/0. I also threw in some 11/0, O-beads, 2 hole triangles and delicas from my stash. The rope is chenille stitch, the clasp is beaded to match, with a crystalette button at each end of the toggle bar. This piece marks my first successful fringe, I’m extremely happy with it.
This slideshow requires JavaScript.
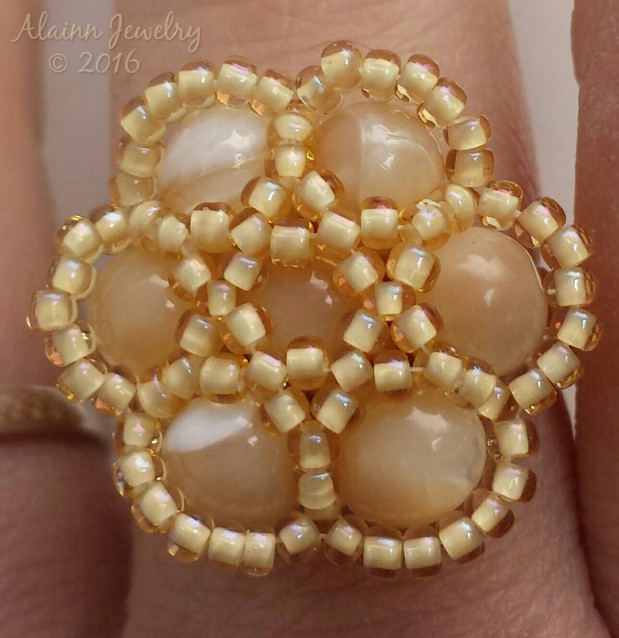
This ring was really fun to make – I didn’t have a direction when I started bezeling the rivoli, I just wanted to try to use the superduos to do it. The waviness kinda threw me, and I almost ripped it apart, but I pushed through my un-comfortableness and ended up with this! It’s kinda big on, I think they call it a cafe ring.
This slideshow requires JavaScript.
I LOVE this bracelet. You may notice some oxidation on the bar, and that’s because I’ve worn it so much since finishing it(the wing flaps wonderfully while on the bike!) Purple is my favorite color so I was stoked when I saw these zebra jasper. I pulled out my coiling “machine” for this one to make the wrapped bead you’ll see on the right. Originally I was not going to include the melon bead, but I needed a medium “spacer”, and I noticed the headpins on the amethyst and labordorite were the same color. It’s the perfect length with it included! The style of the bracelet, stacking the jumprings, was inspired by Dhea Powers. I made a simple pair of dangle earrings to match the bracelet.
This slideshow requires JavaScript.
I felt really special when I received this focal – this was a new medium (etching) for Kelly, and she knocked it out of the park! I debated back and forth whether to add lots of rondelle dangles, which was my original plan. But it just didn’t seem to fit, so I went with simple. I chose to put the clasp at the side because it would be a crime to hide something that awesome! Then I chose rondelles that matched the lampwork bead to dangle from the corner. I made 2 sets of earrings for this one in case I wanted something lighter. The first set uses hammered rings and lampwork beads to match the toggle. The second set is just a few stacked rondelles.
This slideshow requires JavaScript.
These earrings were just quick throw togethers, but oh so sparkly! I love the tin petals and how they make ting ting noises with the rondelles against them as you wear em. I debated adding more to each of them, but didn’t want to overdo it.
This slideshow requires JavaScript.
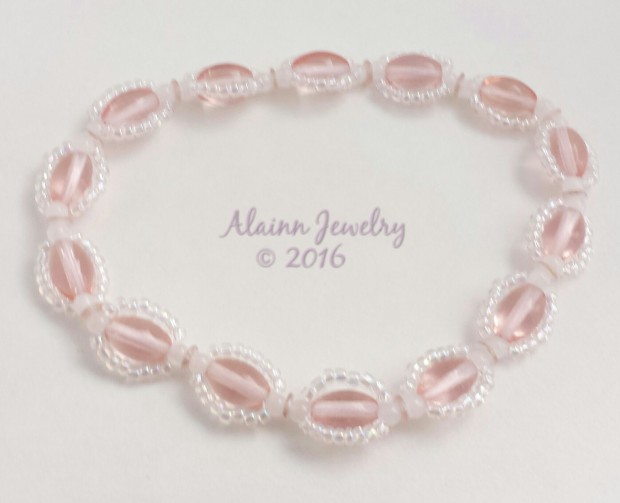
Silver is more my color so I wanted to use some of the zebra jasper for this bracelet. The wire is silver-filled (my first use of it), the toggle is plated. The sea glass barrels picked up the lighter tones in the jasper beautifully, I don’t know that I captured it that well.
This slideshow requires JavaScript.
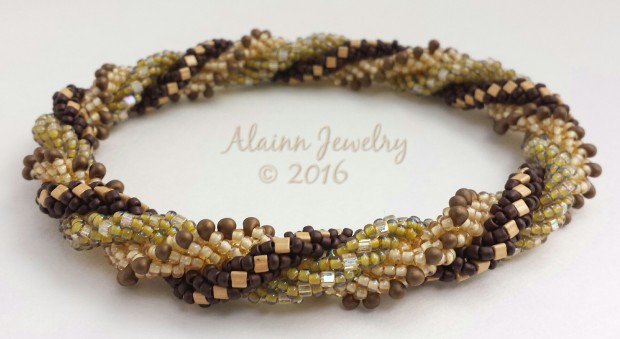
I love the way this bracelet looks – it’s the Maze Lace pattern by Sabine Lippert. To keep the profile low, I modeled the toggle after the thread path used for the bracelet. Very sleek.
This slideshow requires JavaScript.
I got this awesome pattern from Pinterest (my downfall!!) while searching for ways to use 2-hole tiles as I haven’t worked with 2 holed beads a lot. The pattern is by Alex Argai – she makes a lot of patterns with tila/2 holed tiles and superduos. The clasp was an interesting venture. After I made the bar I tried to reinforce it enough times to make it sturdy. And it was pretty sturdy…..then I tried to attach the necklace. I had run out of the beading needles I normally use (which are super cheap but I’ve never EVER broken one), so I had to use some I had picked up while out recently (not so cheap as I only got 4 needles for $5). I managed to break ALL of them within an hour. As I was attaching the bar, one of them broke inside of the superduos. As in NONE of it was showing…..but it did make the bar really straight and sturdy so maybe it was a good thing?
Beads used from Stephanie: czechmate bar/rulla, pearl druks, peacock czechmate tiles

superduo toggle clasp
So that’s what I made! I still have tons of things left! Seriously don’t even feel like I made a dent in either stash I received.
Make sure you head over to my partners to see what they made, you can find the complete list of participants here.
Check out the Pinterest board I created just for the hop….if you’re a participant I can add you so you can post your items there as well!
ALSO – here’s some gorgeous picks of my golden boy modeling a piece with beads from each of my partners. I’m surprised any of these came out decent as he kept thinking I was trying to play ball with him…..
This slideshow requires JavaScript.
NOTE: I have moderation on for all comments, so don’t freak out if you don’t see yours. This also guarantees I’ll see each bc it’ll ping right to my phone
")
")


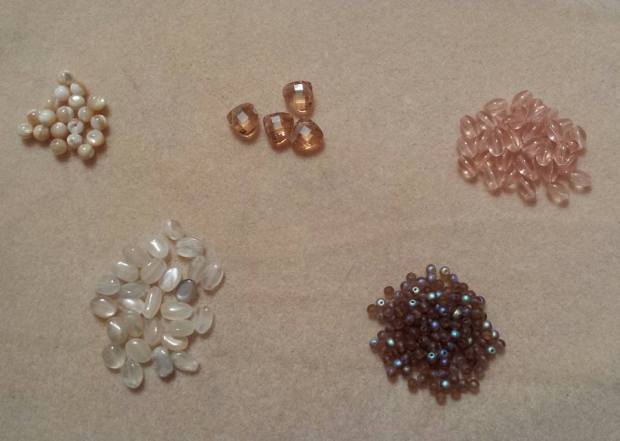 She sent me 2 options for a focal and 2 clasps, an awesome selection of seed beads as well as czech glass, moonstone, mother-of-pearl, bugles, long magatamas and 2 types of carved bone. The options are almost endless!


.jpg")
.jpg")
.jpg")
.jpg")
.jpg")
.jpg")
.jpg")


